
After much anticipation Adobe Animate CC was released early this year to replace Flash Professional. This decision was taken by Adobe to solve the security issues, ad blocker problems and on going lack of mobile support. The name change according to Adobe was to ‘more accurately represent its position as the premier animation tool for the web and beyond’. But is this the case? We’ve created this Easter themed tutorial to see what has changed…
STEP 1: Creating a new animation
- Open Adobe Animate CC.
- Create a new file.
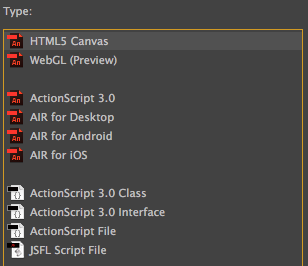
- Select HTML5 Canvas as the type.
HTML5 Canvas and WebGL types were introduced to break free of the restrictions of using ActionScript and Flash Player. The addition of JavaScript allows the animation to be played on a range of desktop or mobile devices. The table below details the browsers that HTML5 Canvas is supported:

STEP 2: Drawing objects
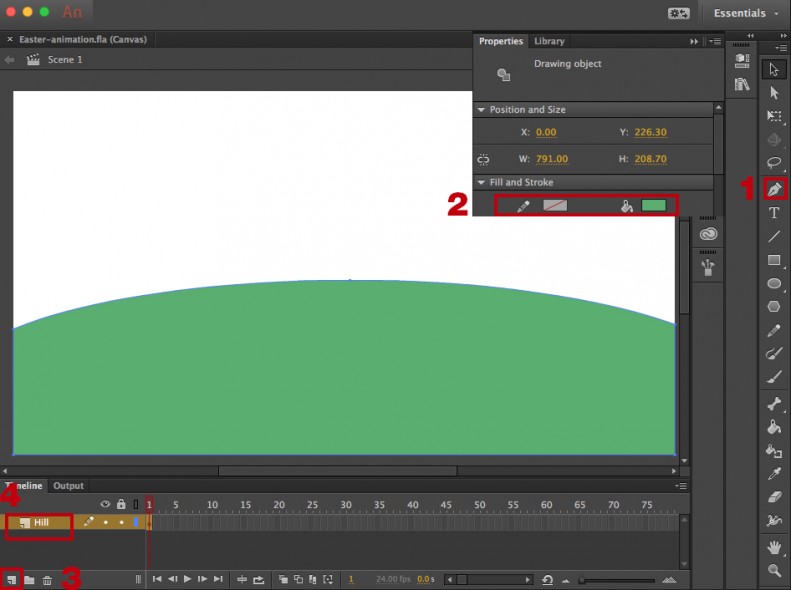
- Objects can be drawn in Adobe Animate in a variety of different ways. We used the pen tool to draw the hills in our Easter scene.
- We changed the properties by clicking on the properties tab to change the fill and stroke colours.
- It’s good practice to create each object on a new layer. To do this click on the new layer icon in the timeline.
- You should name the layer something meaningful. In this case we’ve called it ‘Hill’. To rename a layer double click it and enter your text.
- You can now create the sky, flowers and clouds in the same way. Remember to save your work regularly!
STEP 3: Using assets from Adobe Illustrator
Once you are happy with your countryside scene, it’s time to insert the star of the animation. We found a great vector bunny using a site called http://www.freepik.com/. This is a great site giving you access to a vast collection of vector files that are free for commercial use as long as you attribute the source. Download the Easter bunny we used from here: http://www.freepik.com/free-vector/easter-s-day-bunnies_840769.htm#term=rabbit&page=6&position=4
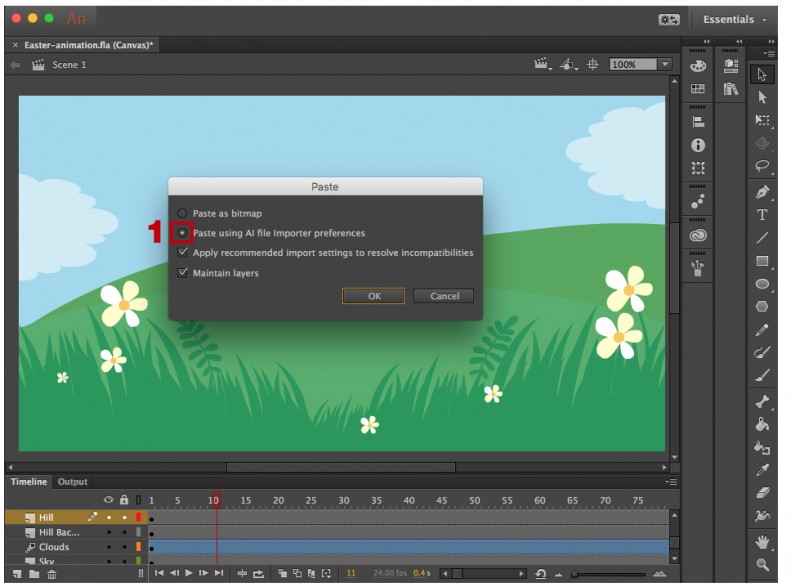
- Once you have downloaded the bunny, open it in Illustrator. Right click on the bunny object and go to ‘Edit’ and ‘Copy’. Then in Adobe Animate click on ‘Edit’ and ‘Paste’. Select ‘Paste using AI file importer preferences’ which will allow you to edit the properties of the bunny (colour etc.) within Adobe Animate.
STEP 4: Converting assets to movie clips
Once you have placed the bunny in your scene you can begin to animate the different parts of its body. We animated its arms, ears and eyes. To do this you will need to separate the elements and convert them into their own movie clips.
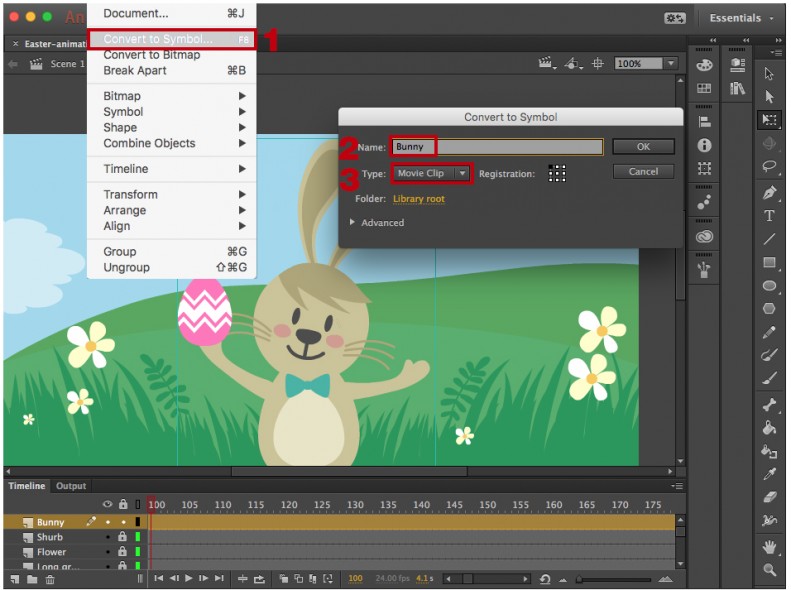
- Start by clicking on the bunny and going to ‘Modify’, ‘Convert to Symbol’.
- Give your new symbol a meaningful name, we’ve called ours ‘Bunny’.
- Select the type as ‘Movie Clip.’
Repeat steps 1-3: Double click on the bunny to enable you work within that movie clip. You will notice that the background layers look faded and the timeline has changed to show only one layer. You now need to split up the bunny into the separate parts to animate. Do this by selecting each part and repeat the steps above. You will end up with the following layers: ‘Left arm’, ‘Head’, ‘Body’ and ‘Right arm’.
STEP 5: Animating assets using motion tween
Now that you have all of the different movie clips in their own layers you can begin to animate them. We used ‘Motion Tween’ to create the animation between two positions.
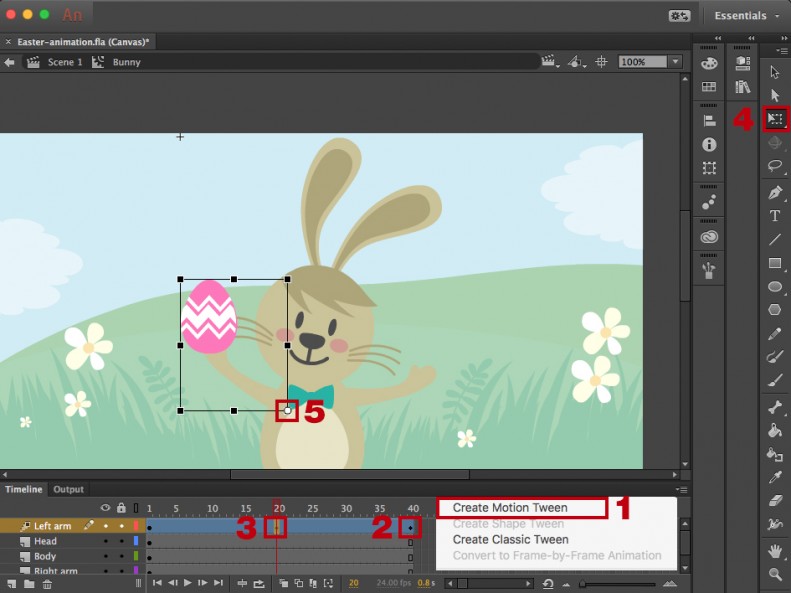
- We will begin by animating the left arm in our ‘Left arm’ layer. Right click on this layer in the timeline and select ‘Create Motion Tween’ from the menu. The layer should now turn blue.
- Click on frame 40 in the timeline and click ‘Insert’, ‘Timeline’ and select ‘Keyframe’. A diamond shape will appear in the frame, indicating that it is a keyframe. As the movement we want to create is the arm moving up and down, the first frame and the last frame (frame 40) will have the arm in the same position.
- We need to add a keyframe onto frame 20, in the same way as step 2. This is the frame we will adjust the arm position.
- Next click on the free transform tool to allow you to move the arm.
- It’s important to move the anchor point (shown as a white circle) to the point that you wish to rotate around. To do this click on it and drag it to the right position, in this case it is the shoulder of the bunny. You can now move the arm downwards to add the motion. TOP TIP: you might want to adjust the ‘ease’ of the animation. You can do this by double clicking on the motion tween layer.
Repeat steps 1-5: Add motion to the right arm and bunny ears in the same way as above. Please note: the ears should be animated within the ‘Head’ movie clip.
STEP 5: Frame-by-frame animation
We didn’t need to use ‘Motion Tween’ to animate the eyes blinking. This is because the effect of them blinking is so fast a transition between the eye open and closed isn’t needed. Instead we created two keyframes, which gave the effect of blinking.
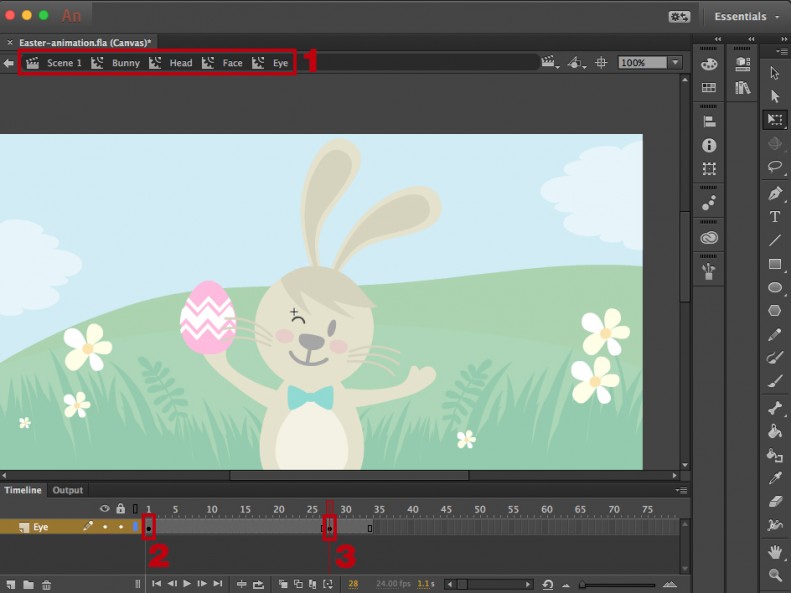
- We created an ‘Eye’ movie clip, this was contained within a ‘Face’ movie clip, within the ‘Head’ movie clip of the bunny. This meant that we only needed to create one eye animation, and could use the same movie clip for the left and right eyes.
- The open eye graphic was shown on frame 1.
- A new keyframe was created on from 28 where the closed eye was drawn.
STEP 6: Using the new brush library panel
A new feature of Adobe Animate that we’ve utilized in this animation is the brush library. This includes various decorative brushes. We used the ‘Cloudy Full’ brush from the ‘Elegant curve and floral brush set’ under the ‘Decorative’ tab.
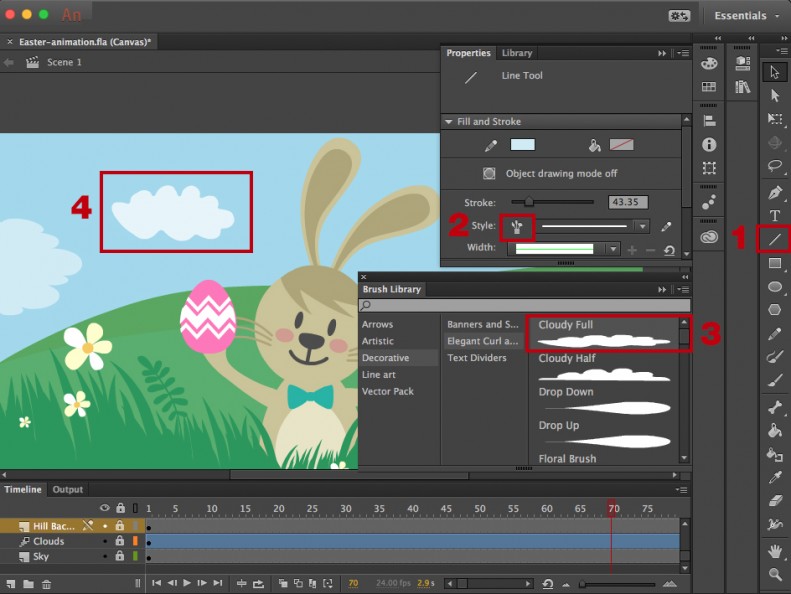
- Select the line tool and draw a line on the stage.
- Under ‘Properties’ click on the ‘Brush Library’ icon.
- Double click on the ‘Cloudy Full’ brush.
- The line now appears in the shape of the brush.
We also added a motion tween to the cloud to animate it going across the sky. To do this follow step 5, ensuring the cloud is positioned at one end of the screen at the start and the opposite end for the final keyframe.
STEP 7: Testing your animation
It’s important to test your animation throughout its development, allowing you to make amendments as you go along.
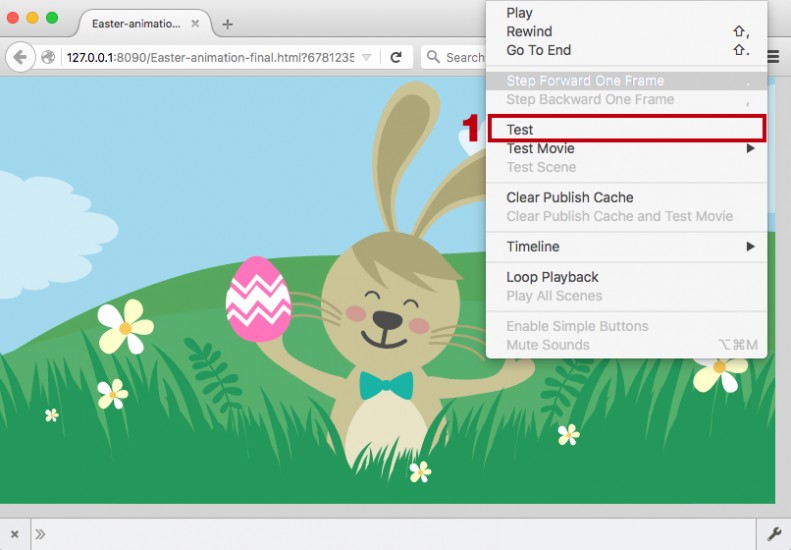
- Click on ‘Control’ from the menu and select ‘Test’. Your animation will then be displayed in your browser. Warning messages appear in the output panel of Adobe Animate, which will help you locate any issues with your animation (this is very useful when adding interaction to your animations in code, as it will highlight any errors).
STEP 8: Publishing your animation
When you are happy with your finished animation you can publish it. To do this go to ’File’ and ‘Publish Settings’. This allows you to change the settings of the published file.
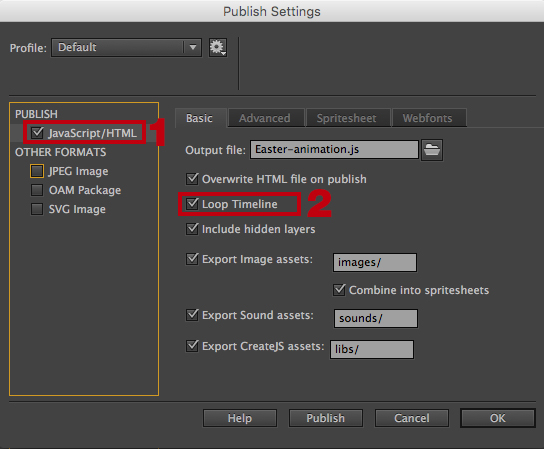
- Select JavaScript/HTML.
- Tick ‘Loop Timeline’ to allow the animation to repeat.
Once you’ve published your animation a .html file and .js file will be saved. Click on the .html file to view your animation. Please note, it is important that both of these files are kept in the same location otherwise the animation will not play.
EXTRA NOTE: Exporting your animation as a GIF
GIF files are great to use for animation, especially within email. We were keen to see if Adobe Animate had addressed the issues when exporting to a GIF. Adobe Animate claims to output animations to virtually any format (now including SVG). However, we found that outputting to a GIF format still has limitations.
Please see below our animation exported as a GIF straight from Adobe Animate:

As you can see, the colours are very limited and the final output is very grainy. Also, any movie clips animating within ‘parent’ movie clips (the animation of the arms, eyes and ears of our bunny contained within the ‘bunny’ movie clip) do not play when exported in this way. This is a real limitation, which would mean the whole animation would have to be contained within the main timeline, which is not a practical way of working.
There is a solution to this problem though! As discussed in our previous blog post ‘LICEcap and Photoshop – the perfect combo for screen capture GIF creation’ LICEcap once again is the answer! Instead of using Adobe Animate to export the GIF file, just screen capture the .html file with LICEcap software. You can then edit this in Photoshop to reduce the file size and maintain the quality.
Summary
Adobe Animate can be used to create some really impressive animations. Anyone that has used Flash Professional will be familiar with the tools and interface; effectively all that’s changed is the name.
Our Easter wish would be for an improved export tool so we can utilize this program for animations within email. As it stands due to the lack of support for JavaScript and HTML5 Canvas in email, the export tool was our only hope, and unfortunately it doesn’t deliver. We’re not happy bunnies Adobe! If this issue is addressed, we think there’s no stopping Adobe Animate from becoming the number 1 program to use for animation on the web!
We’ve mentioned some of the new features of Adobe Animate within this tutorial, if you would like to view the full list of updates please go to: https://helpx.adobe.com/animate/release-note/releasenotes-2015-1.html#
