Following on from our blog on ‘Making animated GIFs in Adobe After Effects’ we recently found another handy tool to aid GIF creation, this time for screen capture. LICEcap is a free piece of software that allows you to record your screen, with the option to output as a GIF file. We found this to be really useful in allowing us to quickly create animated GIFS which we’ve used to demo content on our website and in presentations.
When to use GIFs?
Before you begin, you should assess whether your content is suitable for this purpose. GIF files can only contain a maximum of 256 colours. As a result, they work best with images that contain simple shapes and a limited colour palette, as the example below shows:

If you create a GIF from a detailed photograph you are likely to notice a reduction in quality. However, it doesn’t mean you should rule out using photos completely. Stripping back the colours in your photography can result in a ‘grungy’ look, which can be very effective as the example below shows:
So how does LICEcap work?
Once installed, all you need to do is resize the recording window to fit the content you wish to capture, set the maximum frames per second (MAX FPS) and hit ‘Record’. We set the MAX FPS to 24, which is a standard rate for animation. Simply hit ‘Stop’ when you’re finished and the GIF will be saved in your selected location.

Why use Photoshop?
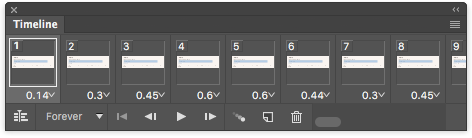
The outputted GIF from LICEcap can be edited in Adobe Photoshop to remove any unwanted screens and refine the animation. To do this, open the GIF and using the timeline window delete any redundant frames by selecting the frame and clicking on the bin icon.
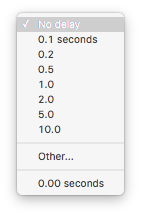
You can also change the delay time of each frame to suit your animation. We changed this to ‘No delay’ for a smoother animation. To do this select all frames, click on the time at the bottom, select a predefined time from the list or ‘Other’ to enter your own. If you’re going to loop your animation it’s good idea to have a pause on the last frame of 1-2 seconds – so set this individually.
When saving your final animation, go to ‘File’, ‘Export’ and ‘Save for Web’. The window below is displayed, allowing you to alter the settings to get the right balance between file size and quality. Try reducing the number of colours to bring the file size down. You can also set the looping options in this window to play ‘Once’, ‘Forever’ or a specified number of times.

In summary, LICEcap is a great capture tool, but Photoshop is it’s perfect partner to give you more control over the final output!
